Overview
This is my first digital book, generated with mdBook, a command line tool to create books starting from markdown files.
Aknowledgements
These are notes I have been taking across the years, and it is a work in progress. I decided to rearrange the notes taken over time, and write the procedures and operations that I carry out most frequently; I hope this work can be useful to others too. I am always opened to learn something new, and to listen or read constructive criticism, so feel free to contact me for any suggestion.
LICENSE
![]()
This project is licensed under the MPLv2 license. See LICENSE file for more details.
Laptop BIOS Key Reference
Here are some shortcuts I found on the Internet, the ones I tested worked as expected.
| Manufacturer | Type | Models | Boot Menu Key(s) | BIOS Key(s) |
|---|---|---|---|---|
| ACER | Esc, F12, F9 | Del, F2 | ||
| netbook | AspireOne, AspireTimeline | F12 | F2 | |
| netbook | Aspirev3, v5, v7 | F12 | F2 | |
| ASUS | ||||
| desktop | F8 | F9 | ||
| laptop | Esc | F2, F9 | ||
| laptop | R503C | F8 | F2, DEL | |
| netbook | EeePC1025c | Esc | F2 | |
| COMPAQ | Esc, F9 | F10 | ||
| Presario | Esc, F9 | F10 | ||
| DELL | ||||
| desktop | Dimension, Inspiron, Latitude | F12 | F2 | |
| desktop | InspironOne2020, 2305, 2320, 2330 All-In-One | F12 | F2 | |
| laptop | Inspiron | F12 | F2 | |
| laptop | Precision | F12 | F12 | |
| HP | ||||
| generic | Esc, F9 | Esc, F10, F1 | ||
| desktop | MediaCenter | Esc | F10 | |
| desktop | Pavilion23AllInOne | Esc | F10 | |
| desktop | Paviliong6andg7 | Esc | F10 | |
| desktop | PavilionHPEPC, h8-1287c | Esc | Esc, F10 | |
| desktop | PavilionPC, p62317c | Esc | Esc, F10 | |
| desktop | PavilionPC, p71297cb | Esc | Esc, F10 | |
| desktop | TouchSmart520PC | Esc | Esc, F10 | |
| laptop | 2000 | Esc | Esc | |
| notebook | Pavilion | Esc | F10 | |
| notebook | ENVYdv6anddv7PC | Esc | Esc | |
| LENOVO | ||||
| desktop | F12, F8, F10 | F1, F2 | ||
| laptop | F12 | F1, F2 | ||
| laptop | IdeaPadP500 | F12 or Fn+F11 | F2 | |
| SAMSUNG | ||||
| F12, Esc | ||||
| netbook | NC10 | Esc | F2 | |
| ultrabook | Series5Ultra and Series7Chronos | Esc | F2 | |
| SONY | VAIO, PCG, VGN | F11, ASSIST | F1, F2, F3 | |
| VGNEsc | F10, ASSIST | F2 | ||
| TOSHIBA | Protege, Satellite, Tecra | F12 | F1, Esc | |
| EquiumF12 | F12 | F12 | ||
| MOTHERBOARDS | ||||
| ASUS | F8 | Del | ||
| GIGABYTE | F12 | Del | ||
| MSI | F11 | Del | ||
| INTEL | F10 | F2 | ||
| ASROCK | F11 | F2, Del | ||
| EVGA | F7 | Del | ||
| OTHER MANUFACTURERS | ||||
| XIAOMI | Notebook MINotebookAir | Fn+F2 | Fn+F2 | |
| PANASONIC | Toughbook | F2 | F2, Del | |
| NEC | F5 | F2 | ||
| PACKARDBELL | F8 | F1, Del | ||
| eMACHINES | F12 | Tab, Del | ||
| FUJITSU | F12 | F2 | ||
| GATEWAY | F11, Esc, F10 | F2, Del | ||
| iBALL | i360 CompBook | F9 | Del | |
| HUAWEI | F2 | F12 | ||
| SHARP | F9 | F2 |
Ventoy
Ventoy is an open source tool to create bootable USB drive for ISO/WIM/IMG/VHD(x)/EFI files, by copying the bootable image files to the USB drive and boot them directly.
It also supports plugins for persistence, theming, and more.
Till now, this is the best tool I have ever tried for this task, as far as it regards versatility and ease of use.
How to Create Linux Symlinks for Files and Directories
In Linux, symbolic links, or symlinks, are a powerful tool for file management.
They are essential in the file system, facilitating efficient file organization and streamlined workflows.
What Are Symbolic Links in Linux?
Symbolic links are Linux files that point to another file or directory. They serve as shortcuts, providing quick access to the target file without duplication. Unlike a hard link, a symlink contains not the data of the target file but a path to it.
Symlinks provide flexibility and efficiency in file management by pointing to the file’s location, which can be anywhere in the system. This makes symlinks useful for referencing files across directories or file systems.
They are convenient for creating easy access points to frequently used files or directories, eliminating the need to copy or move the original files.
What's the Difference Between Soft Links and Hard Links?
Soft links and hard links both create shortcuts to files in different ways.
| TYPE | DESCRIPTION |
|---|---|
| Soft Link | Pointer to the original file, containing only the path leading to it and allowing for links to files on a different file system. |
| Hard Link | Creates a direct association with the target file’s data. It acts as a mirror, sharing the same inode number, but doesn’t use additional storage space. |
Hard links are limited to the same file system as the original file. Any changes to a hard link are reflected in the linked file and vice versa, including file permissions.
Creating Symlinks for Files
You can use either the absolute path (the entire path from the file system’s root) or the relative path (the path relative to the current directory).
ln -s [target file] [symlink name]
Creating Symlinks for Directories
ln -s [target directory] [symlink name]
Arch Linux
Arch Linux is a Linux distribution, based on the KISS philosophy (Keep It Simple, Stupid). It is based on a rolling release upgrading system, and it is said to be kept up to date "on the bleeding edge".
I chose this distro because I can literally sew it on myself, every little config, every package, and this enhance my productivity (and gratifies the nerdiest part of my mind).
Imagine if you were able to build your own guitar. Being the one who choose the woods, the shape, the scale, and then continuing down, to the details that you would have overlooked if you had just bought it as it was. Then, you may focus on die-cast tuners, maybe a slick ebony fretboard, so that your fingers can slide faster. And why not, a neck-through-body construction, to give more sustain to the notes you play. Now it has the right weight and shape, the woods have the colors of your music, and you feel it is actually yours. An extension of your body and mind.
This is an example, of course; it could be a hammer, a trowel, a sword, or maybe a split ortholinear mechanical keyboard.
Will this take more time than using a tool that just works out of the box? Of course. Will it be worth it? This is up to you; it depends on your passion, your dedication and what you will have to sacrifice to achieve your goal.
Sometimes, I break things, but this is always teaching me to solve problems I get into, without surrendering to the inevitables.
Arch Linux took hours of sleep and wakefulness from me. It asked me a lot, but it also gave me back as much.
Breaking Things
Every Arch Linux user knows the right question is not "Will the whole thing break?"
As far as it concerns my personal experience, the right question is "When the whole thing breaks, will I be prepared?"
In this case, prepared could mean:
- Proper partition system
- Packages backup system
- Configuration backup system
- Knowledge/experience
- A live image of Arch Linux on a bootable device
Partitioning
I prefer to keep my /boot/ and my /home/ directories on separate partitions. This way, when the disaster happens, I can destroy all the system directories, keeping my data and custom configs safe in separate partitions.
I have also a local backup of my data and configs, and I try to keep updating the most important dotfiles of mine in a git repository.
This is my partitioning scheme:
[fz@fzpc ~]$ fdisk -l # list all devices

Disk /dev/sda: 698,64 GiB, 750156374016 bytes, 1465149168 sectors
Disk model: WDC WD7500BPKT-0
Units: sectors of 1 * 512 = 512 bytes
Sector size (logical/physical): 512 bytes / 4096 bytes
I/O size (minimum/optimal): 4096 bytes / 4096 bytes
Disklabel type: dos
Disk identifier: 0x000b7bec

Device     Boot     Start        End    Sectors   Size Id Type
/dev/sda1  *         2048    1230847    1228800   600M  b W95 FAT32
/dev/sda2         1230848   66766847   65536000  31,3G 82 Linux swap / Solaris
/dev/sda3        66766848  224053247  157286400    75G 83 Linux
/dev/sda4       224053248 1465149167 1241095920 591,8G 83 Linux
| Device | Partition |
|---|---|
sda1 | /boot |
sda2 | swap |
sda3 | / |
sda4 | /home |
Arch-Chroot
When I boot into an Arch Linux live USB to solve some problems, I always do the following:
- Load the layout for my keyboard:
loadkeys it
- Mount the root filesystem on /mnt:
mount /dev/sda3 /mnt
- Mount the boot filesystem on /mnt/boot:
mount /dev/sda1 /mnt/boot
- Mount the home filesystem on /mnt/home:
mount /dev/sda2 /mnt/home
Now, I ensure that my network connection works:
ping archlinux.org
If not, I read this.
If pacman still works on my system, I am ready to chroot, otherwise I must use pacstrap.
If both my connection to the Internet and pacman work, I chroot into /mnt:
arch-chroot /mnt
Wireless
If you are on an Arch Live USB, you can configure your wireless connection this way:
Get an interactive prompt:
iwctl
Get some help:
iwctl help
List all Wi-Fi devices:
iwctl station list
If the device or its corresponding adapter is turned off, turn it on:
iwctl station device set-property Powered on
iwctl station adapter set-property Powered on
Scan for networks (note that this command will not output anything):
iwctl station device scan
List all available networks:
iwctl station device get-networks
Connect to a network:
iwctl station device connect SSID
Pacstrap
Pacstrap is used to create a new system installation from scratch. Unlike pacman, it does not require the -S flag, but it requires a target directory to be specified for the installation.
Usage
pacstrap [options] root [packages...]
| Command | Description |
|---|---|
pacstrap | Install packages to the specified new root directory. |
pacstrap -i | Install packages to the specified new root directory and run interactively. |
pacstrap -N | Install packages to the specified new root directory in unshare mode. |
Run man pacstrap for more information.
Kernel
Sometimes, after an interrupded update, your Arch Linux system may not boot.
If you got a message like this:
Loading Linux linux...
error: file '/vmzlinuz-linux' not found.
Loading initial ramdisk...
error: you need to load the kernel first.

Press any key to continue...
The steps you may want to follow are the following:
-
Boot into the Arch Linux Live USB
-
Mount your disk as described here
-
Chroot into /mnt
-
Run the following commands:
pacman -S linux mkinitcpio -p linux -
Reboot into your system
Overwrite packages
Sometimes an interrupted packages upgrading process may break several programs/libraries, and you may want to overwrite them.
If pacman still works on your sysstem, all you have to do is:
- Reboot into an Arch Linux Live USB
- Mount your disk as described here
- Chroot into /mnt
- Run the following command:
sudo pacman -S $(pacman -Qnq) --overwrite "*"
- Reboot into your system
The command at step 4 creates a list of all installed packages, and then reinstall them, overwriting the previous versions.
Overview
This section (overview and subchapters) was made possible by the work of Paolo Venturi and Davide Giudici: it is strongly based on their training course about Git.
Git is a version-control system created in 2005.
It is very versatile as far as it regards branches and reposoitories, rollbacks and so on.
It is supported by many clients and IDEs, and it is used by a very active community.
Basic concepts
-
A GIT project is an indivisible unit
- Git works always with the entire source code of the project
- There is no checkout of a single file or directory
-
Peer to peer system
- Git works on a local copy of the entire repository
- The network architecture is customizable (we can choose a distributed or a centralized network model)
-
Storage integrity
- Git stores files in their entirety
- Git does not memorize the changes of a file: it creates a "smart" snapshot of the repository state at a given commit
-
Ramifications
- Strong orientation towards non-linear development
Commit
It is a package containing tree and blob, and it retains the changes we do to one or more project's files.
Git calculates a hash for every commit, used for its identification (the comment we attach to the commit is not unique).
- Commits create the directed acyclic graph of our history:
- Each commit remembers which commit came before it (a merge commit points to two previous commits)
- A commit is a snapshot of the state of your files, with some metadata, informations about it contents, authors and date.
- Each commit has a pointer to the previous one/s, and that pointer makes it unique.
Directed Acyclic Graph (DAG) of Commits
This chart shows a more complex DAG structure typical in Git repositories:
graph TD;
    A[Commit A] --> B[Commit B]
    A --> C[Commit C]
    C --> D[Commit D]
    B --> E[Commit E]
    D --> E
    D --> F[Commit F]
    F --> G[Commit G]
    E --> H[Final Commit]

        linkStyle 0 stroke:#2ca02c,stroke-width:2px
    linkStyle 1 stroke:#2ca02c,stroke-width:2px
    linkStyle 2 stroke:#0000FF,stroke-width:2px
    linkStyle 3 stroke:#00FF00,stroke-width:2px
    linkStyle 4 stroke:#0000FF,stroke-width:2px
    linkStyle 5 stroke:#0000FF,stroke-width:2px
    linkStyle 6 stroke:#0000FF,stroke-width:2px
    linkStyle 7 stroke:#FF0000,stroke-width:2px
Structure
We could see git as a database, holding couples key/value, where:
- Tree (as a unix-like system directory tree)
- Blobs (comparable to files)
- Commit
- Tags
graph TD

  A[Commit 25a9001] ==o B
  B[Commit 6abe5512] ==libs==o C1
  B ==templates==o C2
  C1[libs 52d09140] ==lyrics.txt==o D1
  C2[templates 12ef5142] ==template.txt==o D2
  D1[Finding beauty in the dissonance]
  D2[This is an empty template]

  style A fill:#1f77b4,stroke:#1f77b4,stroke-width:2px
  style B fill:#ff7f0e,stroke:#ff7f0e,stroke-width:2px
  style C1 fill:#2ca02c,stroke:#2ca02c,stroke-width:2px
  style C2 fill:#2ca02c,stroke:#2ca02c,stroke-width:2px

  linkStyle 0 stroke:#2ca02c,stroke-width:2px
  linkStyle 1 stroke:#2ca02c,stroke-width:2px
  linkStyle 2 stroke:#2ca02c,stroke-width:2px
  linkStyle 3 stroke:#2ca02c,stroke-width:2px
  linkStyle 4 stroke:#2ca02c,stroke-width:2px
Here we can see how every "block" has a corresponding label: we refer to these labels as tags.
graph TD
    A[Working Directory]:::workingDir --o|add| B[Staging Area or Index]:::stagingArea
    B -->|commit| C[Local Repository]:::localRepo
    C -->|push| D[Remote Repository]:::remoteRepo
    D -->|pull| C
    C --> E[Branch]:::branch
    E --> F[Commit]:::commit

    subgraph Local Repository
        C
        E
        F
    end

    subgraph Remote Repository
        D
    end

    classDef workingDir fill:#f9f,stroke:#333,stroke-width:2px;
    classDef stagingArea fill:#ff9,stroke:#333,stroke-width:2px;
    classDef localRepo fill:#9f9,stroke:#333,stroke-width:2px;
    classDef remoteRepo fill:#9ff,stroke:#333,stroke-width:2px;
    classDef branch fill:#f99,stroke:#333,stroke-width:2px;
    classDef commit fill:#99f,stroke:#333,stroke-width:2px;

    linkStyle 0 stroke:#2ca02c,stroke-width:2px
    linkStyle 1 stroke:#2ca02c,stroke-width:2px
    linkStyle 2 stroke:#0000FF,stroke-width:2px
    linkStyle 3 stroke:#FF0000,stroke-width:2px
    linkStyle 4 stroke:#0000FF,stroke-width:2px
    linkStyle 5 stroke:#0000FF,stroke-width:2px
Branches
Branches are labels on commits. They allow multiple lines of development to occur in parallel, making it easier to experiment and manage features or fixes separately.
Checking out a branch passes the HEAD label to that commit, which means that any new commits you make will be positioned on the branch you are currently on.
Basic Branching Structure
This chart illustrates a basic branch structure, showing how different branches diverge from a common commit:
graph TD;
    A[Commit A] --> B[Commit B]
    A --> C[Feature Branch]
    C --> D[Commit C]
    C --> E[Commit D]
    B --> F[Commit E]
    F --> G[Commit F]
Managing branches
Creating a new branch locally
To create a new branch and switch to it, use the following command:
git checkout -b [branch-name]
This command creates a new branch in your local repository, and switches to it by updating the index and the files in the working tree.
Pushing the new branch remotely
Once you've completed your work, commit the changes, and push them to your remote repository:
git add -A
git commit -m "commit message"
git push -u origin [branch-name]
The -u flag sets the upstream for the branch, allowing you to use git push and git pull without explicit arguments in the future.
Deleting a branch locally
To delete a local branch that you no longer need, use:
git branch -d [branch-name]
If the branch has unmerged changes, you can forcefully delete it using:
git branch -D [branch-name]
Deleting a branch remotely
To delete a branch from the remote repository, use:
git push origin --delete [branch-name]
Renaming a branch
To rename a branch while you are on it, use:
git branch -m [new-branch-name]
To rename a branch while you are not on it, use:
git branch -m [old-branch-name] [new-branch-name]
Feature Development and Final Merge
This chart represents the process of developing a feature branch and merging it into the main branch:
graph TD;
    A[Main Branch]:::main --> B[Initial Commit]:::initial
    A --> C[Development Branch]:::development
    C --> D[Feature Commit 1]:::feature1
    C --> E[Feature Commit 2]:::feature2
    D --> F[Feature Commit 3]:::feature3
    F -->|Merge| G[Merge Commit]:::merge
    G --> A

    classDef main fill:#add8e6, stroke:#000, stroke-width:2px;
    classDef initial fill:#90ee90, stroke:#000, stroke-width:2px;
    classDef development fill:#f08080, stroke:#000, stroke-width:2px;
    classDef feature1 fill:#fafad2, stroke:#000, stroke-width:2px;
    classDef feature2 fill:#ffb6c1, stroke:#000, stroke-width:2px;
    classDef feature3 fill:#ffcc99, stroke:#000, stroke-width:2px;
    classDef merge fill:#e6e6fa, stroke:#000, stroke-width:2px;
    classDef link stroke:#696969, stroke-width:2px;

        linkStyle 0 stroke:#2ca02c,stroke-width:2px
    linkStyle 1 stroke:#2ca02c,stroke-width:2px
    linkStyle 2 stroke:#FFA500,stroke-width:2px
    linkStyle 3 stroke:#FF0000,stroke-width:2px
    linkStyle 4 stroke:#FFA500,stroke-width:2px
    linkStyle 5 stroke:#FFA500,stroke-width:2px
    linkStyle 6 stroke:#667700,stroke-width:2px
-
Keep Branches Short-Lived: Branches should be focused and merged back into the main line of development (often
mainormaster) as soon as possible. -
Use Descriptive Names: Branch names should convey the purpose (e.g.,
feature/login,bugfix/header-bug) to make collaboration easier. -
Regularly Pull Changes: If working in a team, make sure to regularly pull changes from the main branch into your feature branches to minimize merge conflicts.
-
Rebase vs. Merge: If you want to maintain a clean project history, consider using
git rebaseinstead ofgit merge. This linearizes the commit history. -
Use Pull Requests (PR): When collaborating, use PRs to review code before merging it into the main branch to ensure code quality and maintainability.
By following these practices, you can effectively manage branches in Git and maintain a clean history of your project's development.
Merge
This document explains the concept of fast forward and no fast forward merges in Git, as illustrated in the provided diagram.
Explanation
Initial State
Initially, we have two branches: master and dev.
graph TD;
    A[Task 1]:::task --> B[Task 2]:::task
    B --> C[Task 3]:::task
    C --> D[Final Task]:::finalTask
    C --> master[Master Branch]:::branch
    D --> dev[Development Branch]:::branch
    classDef finalTask fill:#90ee90, stroke:#000, stroke-width:2px;
    classDef branch fill:#f08080, stroke:#000, stroke-width:2px;

    linkStyle 0 stroke:#2ca02c,stroke-width:2px
    linkStyle 1 stroke:#2ca02c,stroke-width:2px
    linkStyle 2 stroke:#2ca02c,stroke-width:2px
    linkStyle 3 stroke:#0000FF,stroke-width:2px
    linkStyle 4 stroke:#0000FF,stroke-width:2px
Fast Forward Merge
When the master branch is merged into the dev branch and there are no new commits in the master branch, we can perform a fast forward merge. This will move the master branch pointer to the latest commit in the dev branch.
graph TD;
    A[Task A]:::task --> B[Task B]:::task
    B --> C[Task C]:::task
    C --> D[Final Task]:::finalTask
    D --> dev[Development Branch]:::branch
    D --> master[Master Branch]:::branch

    classDef task fill:#add8e6, stroke:#000, stroke-width:2px;
    classDef finalTask fill:#90ee90, stroke:#000, stroke-width:2px;
    classDef branch fill:#f08080, stroke:#000, stroke-width:2px;

    linkStyle 0 stroke:#2ca02c,stroke-width:2px
    linkStyle 1 stroke:#2ca02c,stroke-width:2px
    linkStyle 2 stroke:#2ca02c,stroke-width:2px
    linkStyle 3 stroke:#0000FF,stroke-width:2px
    linkStyle 4 stroke:#0000FF,stroke-width:2px
No Fast Forward Merge
If there are new commits in the master branch, a merge commit is created to combine the histories of the master and dev branches. This results in a no fast forward merge.
graph TD;
    A[Task A]:::task --> B[Task B]:::task
    B --> C[Task C]:::task
    C --> M[Merge Commit]:::merge
    C --> D[Final Task]:::finalTask
    M --> master[Master Branch]:::branch
    D --> dev[Development Branch]:::branch
    M --> D;

    classDef task fill:#add8e6, stroke:#000, stroke-width:2px;
    classDef finalTask fill:#90ee90, stroke:#000, stroke-width:2px;
    classDef merge fill:#ffcc00, stroke:#000, stroke-width:2px;
    classDef branch fill:#ff7f50, stroke:#000, stroke-width:2px;

    linkStyle 0 stroke:#2ca02c,stroke-width:2px
    linkStyle 1 stroke:#2ca02c,stroke-width:2px
    linkStyle 2 stroke:#ff4500,stroke-width:2px
    linkStyle 3 stroke:#2ca02c,stroke-width:2px
    linkStyle 4 stroke:#0000ff,stroke-width:2px
    linkStyle 5 stroke:#0000ff,stroke-width:2px
Commands
To perform a fast forward merge:
# Switch to master branch
git checkout master

# Merge dev branch into master
git merge dev
Optionally, you may choose to delete the feature branch after merging:
git branch -d dev               # Delete the local `develop` branch
git push origin --delete dev    # Delete the remote `develop` branch
To ensure no fast forward merge:
# Switch to master branch
git checkout master

# Merge dev branch into master with no fast forward option
git merge --no-ff dev
Summary
- Fast Forward Merge: Moves the branch pointer forward without creating a new commit.
- No Fast Forward Merge: Combines branch histories and creates a new merge commit.
Mirroring a repository from Gitlab to GitHub
Here's a step by step guide on how to mirror a repository from GitLab to GitHub.
- Go to your repository on GitLab, then:
- Settings → Repository → Mirroring repositories
- Click on Add new
- In the form Git repository URL, type your Github repo's URL, according to this logic:
ssh://github.com/[your-username]/[your-repo-name].git
- Click on Detect host keys
- In the form Authentication method, select SSH public key
- Click on Mirror repository.
- By clicking the apporiate button, copy your SSH public key.
- On Github, go to your repository.
- Click on Settings → Deploy keys
- Click on Add deploy key
- In the form Title, type something like "deploy key" and in the form Key paste your public key.
- Flag the field Allow write access, then click on Add key.
- Go back to GitLab, and go to your repository on GitLab.
- In Settings → Repository → Mirroring repositories, under your mirrored repository, click the Refresh button.
Contributions
After making many mistakes about it, I decided to note down a workflow for my contributions to git repositories.
-
Fork the repository
-
Clone your fork
git clone [your fork] && cd [your fork]
- Configure git to pull master/main branch from the original repository
git remote add upstream [original repository]
- Create your branch
git checkout -b <your branch>
- Commit
git add -A && git commit -m "commit message"
- Push
git push
- Create a merge request or a pull request.
Basic Commands
In Git, there are several fundamental commands that every user should know to effectively manage their repositories. This page outlines some of the essential commands and their functionalities.
Here is a little animation to demonstrate some concepts we are going to explain in the next pages:
1. git init
Creates a new Git repository.
# Initialize a new Git repository
git init
2. git clone
Copies an existing repository to your local machine.
# Clone a repository from a remote source
git clone <repository-url>
3. git add
Adds changes in your working directory to your staging area.
# Stage changes for the next commit
git add <file>
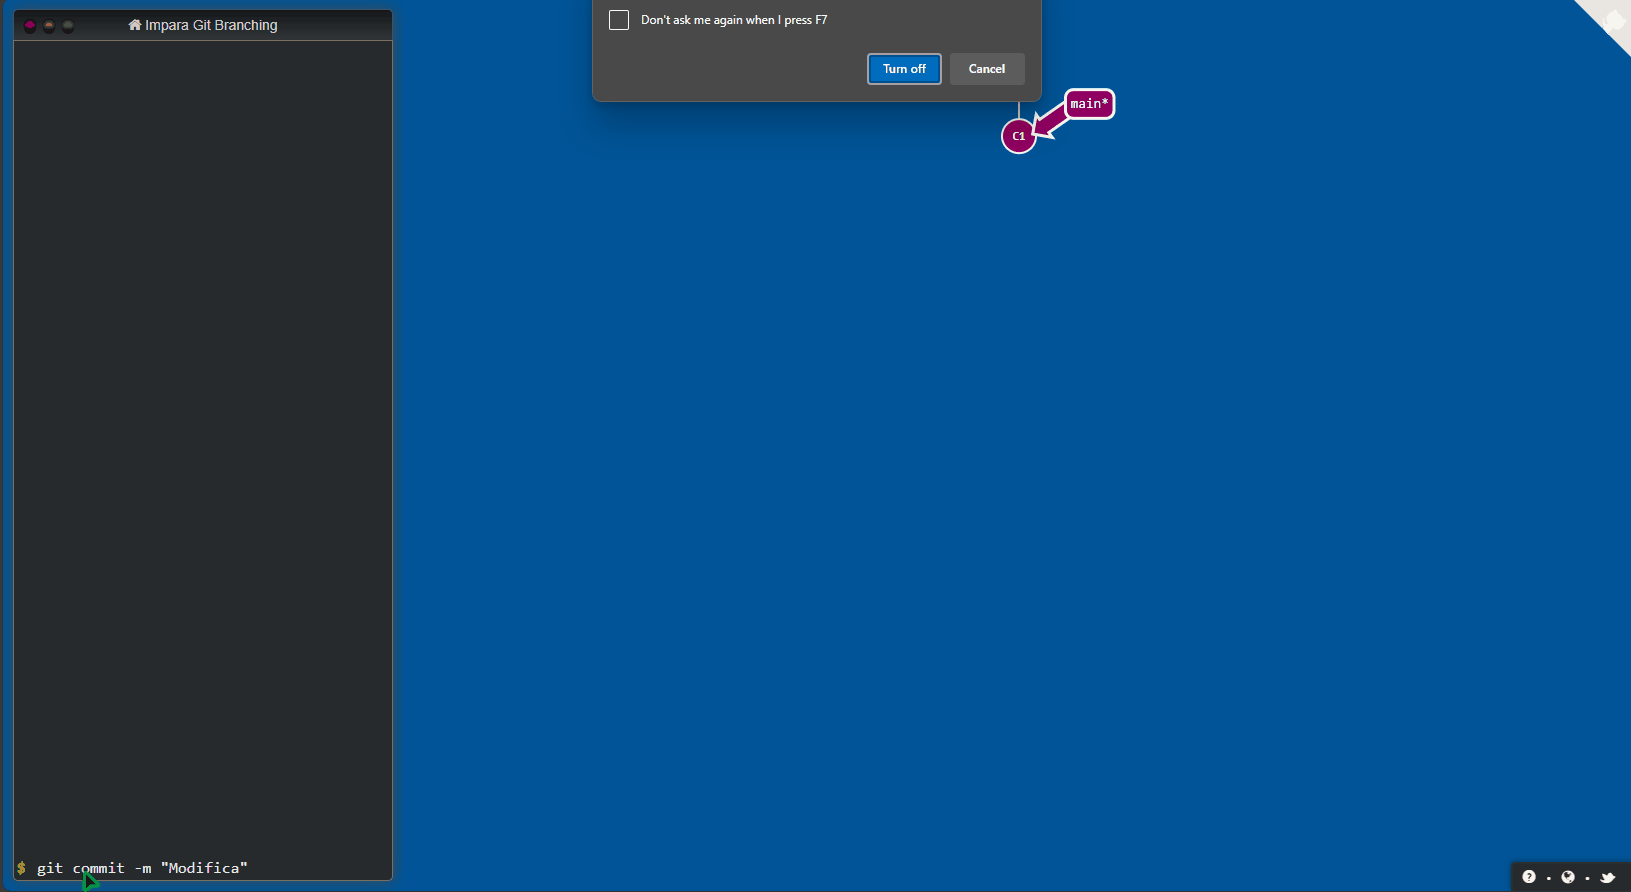
4. git commit
Records the staged changes in the repository.
# Commit the staged changes
git commit -m "Commit message"
5. git status
Displays the state of the working directory and the staging area.
# Show the status of changes
git status
6. git push
Uploads local repository content to a remote repository.
# Push changes to the remote repository
git push <remote> <branch>
7. git pull
Fetches and merges changes from a remote repository to your local repository.
# Pull changes from the remote repository
git pull <remote> <branch>
8. git branch
Lists, creates, or deletes branches.
# List all branches
git branch
We are now going to do a deep-dive into the other commands in the next pages.
Cherry Pick
Cherry picking is a Git command that allows you to apply the changes introduced by specific commits from one branch onto another branch. This is useful when you want to apply a particular change without merging the entire branch.
Use Cases
- Selective Changes: When you want to bring specific features or bug fixes from one branch to another without merging all commits.
- Hotfixes: You may need to apply a bug fix from a development branch directly to the master branch while keeping the other changes in the development branch.
How Cherry Picking Works
When you cherry pick a commit, Git will create a new commit that applies the changes made in the picked commit to your current branch.
graph TD;
    A[Original Commit]:::commit --> B[Original Branch]:::branch
    B --> C[Current Branch]:::branch
    B --> D[Cherry Picked Commit]:::commit

    classDef commit fill:#90ee90, stroke:#000, stroke-width:2px;
    classDef branch fill:#f08080, stroke:#000, stroke-width:2px;
Squash
Squashing is a Git feature that allows you to combine multiple commits into a single commit. This is often used to create a cleaner project history before merging changes.
What is Squash?
Squashing combines two or more consecutive commits into one, which helps to simplify the commit history and makes it easier to understand the changes made.
How Squash Works
When you squash commits, Git will compress the selected commits into a single commit. You can do this using an interactive rebase.
graph TD;
    A[Commit A]:::commit --> B[Commit B]:::commit
    B --> C[Commit C]:::commit
    D[Master Branch]:::branch --> E[Commit D]:::commit
    E --> F[Commit E]:::commit

    B --> G[Start Squashing]:::action
    G --> H[Combined Commit]:::commit

    classDef commit fill:#90ee90, stroke:#000, stroke-width:2px;
    classDef branch fill:#f08080, stroke:#000, stroke-width:2px;
    classDef action fill:#ffcc00, stroke:#000, stroke-width:2px;

    linkStyle 0 stroke:#2ca02c,stroke-width:2px
    linkStyle 1 stroke:#2ca02c,stroke-width:2px
    linkStyle 2 stroke:#2ca02c,stroke-width:2px
    linkStyle 3 stroke:#2ca02c,stroke-width:2px
    linkStyle 4 stroke:#ff4500,stroke-width:2px
Example Squash
- Assume you have the following commits in your
devbranch:
graph TD;
    M[Master]:::branch --> A[Commit A]:::commit
    A --> B[Commit B]:::commit
    B --> C[Commit C]:::commit
    A --> D[Commit D]:::commit

    classDef commit fill:#90ee90, stroke:#000, stroke-width:2px;
    classDef branch fill:#f08080, stroke:#000, stroke-width:2px;

    linkStyle 0 stroke:#2ca02c,stroke-width:2px
    linkStyle 1 stroke:#2ca02c,stroke-width:2px
    linkStyle 2 stroke:#2ca02c,stroke-width:2px
- To squash the last two commits into one, initiate an interactive rebase:
# Start interactive rebase for the last 3 commits
git rebase -i HEAD~3
- In the editor that opens, change the command for the last commit from
picktosquashors:
pick <commit-hash-A> Commit A
pick <commit-hash-B> Commit B
squash <commit-hash-C> Commit C
- After saving and exiting, Git will prompt you to edit the commit message for the new combined commit.
Commands
To perform a squash:
# Start an interactive rebase
git rebase -i HEAD~<number-of-commits>
For example:
# Squash the last 3 commits
git rebase -i HEAD~3
Summary
- Squash: Combines multiple commits into a single commit for a cleaner history.
- Commands:
git rebase -i HEAD~<number>, followed by adjusting commit actions in the editor.
Reverts
To revert to a previous commit, you must first get the commit ID. To do that, run the command git log and copy the commit ID that you want to revert to.
Then run the command git revert <commit ID> to revert the commit.
For example:
git log --oneline
98de210 (HEAD -> main, origin/main) Import webbrowser
885cb83 Edited README via Termux on Android
fe40696 Added function to autostart brower
5d3db85 Fixed typo
7947d96 allow other devices on the same LAN to access the app
2b0e5af Added the possibility to download overlayed images and to delete the DOWNLOAD_DIR
8f9452f changed stylesheet, added table style
b39ce41 added virtualenv support - changed names
567467a Fixed overlay_frame_on_image function
8f1994b Added requirements to README
a9dd924 Merge branch 'main' into 'main'
3ef6ebf Add working folders to .gitignore
9b1e8e7 Converted demo video to gif
Then run git revert <commit ID> to revert the commit.
git revert 98de210
To revert to a commit that has been merged into another branch, you can use the command git revert <commit ID> --merge <branch name>
git revert 98de210 --merge main
Rebase
Rebasing is a powerful feature in Git that allows you to integrate changes from one branch into another. This document explains how to rebase and provides visual diagrams to illustrate the process.
What is Rebase?
Rebasing involves moving or combining a sequence of commits to a new base commit. This results in a linear project history and can help simplify merge conflicts.
How Rebase Works
When you rebase a branch onto another, Git replays the commits from your current branch on top of the specified branch.
graph TD;
    A[Commit A]:::commit --> B[Commit B]:::commit
    B --> C[Commit C]:::commit
    D[Master Branch]:::branch --> E[Commit D]:::commit
    E --> F[Commit E]:::commit

    B --> G[Rebase onto Master]:::action
    G --> F[New Commit C']:::commit

    classDef commit fill:#90ee90, stroke:#000, stroke-width:2px;
    classDef branch fill:#f08080, stroke:#000, stroke-width:2px;
    classDef action fill:#ffcc00, stroke:#000, stroke-width:2px;

    linkStyle 0 stroke:#2ca02c,stroke-width:2px
    linkStyle 1 stroke:#2ca02c,stroke-width:2px
    linkStyle 2 stroke:#2ca02c,stroke-width:2px
    linkStyle 3 stroke:#2ca02c,stroke-width:2px
    linkStyle 4 stroke:#ff4500,stroke-width:2px
Example Rebase
- Assume you have a feature branch
devbased onmaster. The commits look like this:
graph TD;
    M[Master]:::branch --> A[Commit A]:::commit
    A --> B[Commit B]:::commit
    M --> C[Commit C]:::commit

    classDef commit fill:#90ee90, stroke:#000, stroke-width:2px;
    classDef branch fill:#f08080, stroke:#000, stroke-width:2px;

    linkStyle 0 stroke:#2ca02c,stroke-width:2px
    linkStyle 1 stroke:#2ca02c,stroke-width:2px
    linkStyle 2 stroke:#2ca02c,stroke-width:2px
- If you want to rebase your
devbranch ontomaster, after runninggit rebase master, the history would look like:
graph TD;
    M[Master]:::branch --> A[Commit A]:::commit
    A --> B[Commit B]:::commit
    C[Commit C]:::commit
    B --> D[New Commit C']:::commit

    classDef commit fill:#90ee90, stroke:#000, stroke-width:2px;
    classDef branch fill:#f08080, stroke:#000, stroke-width:2px;

    linkStyle 0 stroke:#2ca02c,stroke-width:2px
    linkStyle 1 stroke:#2ca02c,stroke-width:2px
    linkStyle 2 stroke:#2ca02c,stroke-width:2px
Commands
To perform a rebase:
# Start rebasing onto another branch
git rebase <branch>
For example:
# Rebase dev branch onto master
git rebase master
To continue the rebase after resolving conflicts:
git rebase --continue
To abort the rebase process:
git rebase --abort
Handling Conflicts
During rebasing, if you encounter conflicts, you'll need to resolve them manually. Once you've fixed the conflicts, use the commands above to continue or abort the rebase.
Summary
- Rebase: Moves or combines commits to a new base commit for a linear history.
- Commands:
git rebase <branch>,git rebase --continue,git rebase --abort. - Conflict Resolution: Similar to merging, requires manual intervention in case of conflicts.
Reset
To reset a branch to a specific commit, use the git reset command.
For example:
 git log --oneline
d2cda98 (HEAD -> testing, origin/testing) renamed utils.py
6239db6 Updated README towebapp - testing branch
1ce064e Specified where to put font files
f4d4205 Fixed generate_css function
5abf634 Testing
651dc83 (origin/main, origin/HEAD, main) Edited README
7581ce1 Added demo
74e0e66 Initial commit
To go back to the second commit, run the git reset command followed by the commit ID. That is:
git reset 6239db6
If you want to undo a commit and the all the changes made after that commit, attach the --hard flag to your git reset command.
Let's test this out by reverting back to the first commit:
git reset --hard d2cda98
git reset is a good option when you realize that the changes being made to a particular local branch should be undone.
git revert is a good option for reverting changes pushed to a remote repository.
Git Switch vs. Checkout: What's the Difference?
In Git, the commands checkout and switch are used for moving between branches or checking out different commits. However, their usage and implications are different. This page discusses these two commands, their functionalities, and outlines when to use each.
What is Git Checkout?
The git checkout command is a versatile command that serves multiple purposes, including:
- Switching to a different branch.
- Creating a new branch from the current branch.
- Restoring files in your working directory.
How Checkout Works
When you use git checkout <branch>, Git updates the working directory and the index to match the specified branch, allowing you to start working on it.
graph TD;
    A[Current Branch]:::branch --> B[git checkout <branch>]:::action
    B --> C[New Branch]:::branch
    B --> D[Updated Working Directory]:::working

    classDef branch fill:#f08080, stroke:#000, stroke-width:2px;
    classDef action fill:#ffcc00, stroke:#000, stroke-width:2px;
    classDef working fill:#90ee90, stroke:#000, stroke-width:2px;

    linkStyle 0 stroke:#2ca02c,stroke-width:2px
    linkStyle 1 stroke:#2ca02c,stroke-width:2px
What is Git Switch?
Introduced in Git 2.23, the git switch command is specifically designed for switching branches and is intended to make the behavior clearer. It simplifies the process of moving between branches.
How Switch Works
When you use git switch <branch>, it focuses solely on changing the current branch, without the additional functionalities that checkout provides.
graph TD;
    E[Current Branch]:::branch --> F[git switch <branch>]:::action
    F --> G[New Branch]:::branch

    classDef branch fill:#f08080, stroke:#000, stroke-width:2px;
    classDef action fill:#ffcc00, stroke:#000, stroke-width:2px;

    linkStyle 0 stroke:#2ca02c,stroke-width:2px
    linkStyle 1 stroke:#2ca02c,stroke-width:2px
Key Differences
Functions
-
git checkout:
- Can switch branches.
- Can create new branches.
- Can restore files from a different commit.
-
git switch:
- Only designed for switching branches.
- Does not restore files or create branches.
Usage
- Use
git checkoutwhen you want more versatility or need to restore files. - Use
git switchwhen you simply want to change branches and prefer a clearer command.
Summary
- Git Checkout: A multipurpose command for switching branches, creating branches, and restoring files.
- Git Switch: A focused command for switching branches, introduced for clarity and simplicity.
- Recommendation: Prefer
git switchfor changing branches to enhance command readability, while usinggit checkoutfor more complex tasks.
Publish an md-book on GitHub Pages
I have just started using md-book to write documentation for my projects.
Here's a step by step guide on how to publish an md-book on GitHub Pages.
- Create a public repository.
- In the repository, add a src directory., and put all your md files there.
- Create a simple book.toml.
- Go to your repository on GitHub; in Settings → Actions → General, under the Workflow Permissions section, enable Read & Write Permissions, and flag Allow GitHub Actions to create and approve pull requests.
- Create a mdBook workflow (mdbook.yml)
- Set your Github Page deployment to newly created 'gh-pages' branch.
mdBook-mermaid
mdBook-mermaid is a preprocessor for mdbook to add mermaid.js support.
Mermaid.js is a JavaScript based diagramming and charting tool that renders Markdown-inspired text definitions to create and modify diagrams dynamically.
Installation from source
git clone https://github.com/badboy/mdbook-mermaid.git && cd mdbook-mermaid && cargo install mdbook-mermaida
Configure your mdBook to use mdbook-mermaid
When adding mdbook-mermaid for the first time, let it add the required files and configuration:
mdbook-mermaid install path/to/your/book
This will add the following configuration to your book.toml:
[preprocessor.mermaid]
command = "mdbook-mermaid"

[output.html]
additional-js = ["mermaid.min.js", "mermaid-init.js"]
Python Virtual Environments
In distros such as Arch Linux, you cannot install Python packages with pip; if you try to launch a command like:
python -m pip install <package>
The system will return an error message:
This environment is externally managed
╰─> To install Python packages system-wide, try 'pacman -S
    python-xyz', where xyz is the package you are trying to
    install.

    If you wish to install a non-Arch-packaged Python package,
    create a virtual environment using 'python -m venv path/to/venv'.
    Then use path/to/venv/bin/python and path/to/venv/bin/pip.
The reason the user location is blocked by this is mentioned in the PEP:

    This may pose a critical problem for the integrity of distros, which often have package-management tools that are themselves written in Python. For example, it’s possible to unintentionally break Fedora’s dnf command with a pip install command, making it hard to recover.

    This applies both to system-wide installs (sudo pip install) as well as user home directory installs (pip install --user), since packages in either location show up on the sys.path of /usr/bin/python3.
I often try softwares whose backend is written in Python, and I prefer to install them in virtual environments, one for each project. It may seem a waste of disk space, but this ensures that the library versions specified in requirements.txt are respected, and no conflicts arise. Plus, you work in an isolated environment; this gives you more control over what you install, and you have some advantages, such as:
- you don't need to worry about your system's Python version
- every change you make does not break anything
- you can remove the software by simply deleting its directory
So, what I usually do is creating a virtual environment with the name of the project, then cloning the repository inside its directory.
virtualenv <project> && git -C <project> clone <repo>
cd <project> && mv -f <project>/{.,}* . && rm -rf <project>
source bin/activate && python3 -m python3 -m pip install --upgrade pip
pip install -r requirements.txt
To activate the virtual environment, just type:
source bin/activate
To deactivate the virtual environment, just type:
deactivate
Run Docker commands without sudo
Verify if the docker group exists
$ sudo getent group docker
If it doesn't exist, add it:
$ sudo groupadd docker
Add the connected user $USER to the docker group
- Optionally change the username to match your preferred user.
$ sudo gpasswd -a $USER docker
Log out and log back in so that your group membership is re-evaluated.
Restart the docker daemon
If you are on systemd
$ sudo systemctl restart docker
Images
Useful command to stop all images
docker stop $(docker ps -a -q)
Useful command to remove all images
docker rmi $(docker images -q)
| Command | Description |
|---|---|
docker image | Manage images. |
docker image build | Build an image from a Dockerfile. |
docker image history | Show the history of an image. |
docker image import | Import the contents from a tarball to create a filesystem image. |
docker image inspect | Display detailed information on one or more images. |
docker image load | Load an image from a tar archive or STDIN. |
docker image prune | Remove unused images. |
docker rmi | Remove one or more images. |
docker image save | Save one or more images to a tar archive (streamed to STDOUT by default). |
docker image tag | Create a tag TARGET_IMAGE that refers to SOURCE_IMAGE. |
docker image ls | List images. |
docker pull | Download an image from a registry. |
docker push | Upload an image to a registry. |
Containers
Useful command to stop all containers
docker stop $(docker ps -a -q)
Useful command to remove all containers
docker rm $(docker ps -a -q)
| Command | Description |
|---|---|
docker container | Manage containers. |
docker container attach | Attach local standard input, output, and error streams to a running container. |
docker container commit | Create a new image from a container's changes. |
docker container create | Create a new container. |
docker container diff | Inspect changes to files or directories on a container's filesystem. |
docker container exec | Execute a command in a running container. |
docker container export | Export a container's filesystem as a tar archive. |
docker container inspect | Display detailed information on one or more containers. |
docker container kill | Force stop a running container. |
docker container logs | Fetch the logs of a container. |
docker container ls | List containers. |
docker container pause | Pause all processes within a container. |
docker container port | List port mappings or a specific mapping for the container. |
docker container prune | Remove all stopped containers. |
docker container rename | Rename a container. |
docker container restart | Restart one or more containers. |
docker container rm | Remove one or more containers. |
docker container run | Run a command in a new container. |
docker container start | Start one or more stopped containers. |
docker container stats | Display a live stream of container(s) resource usage statistics. |
docker container stop | Stop one or more running containers. |
docker container top | Display the running processes of a container. |
docker container unpause | Unpause all processes within a container. |
docker container update | Update resource configs of one or more containers. |
docker container wait | Block until a container stops, then print its exit code. |
docker container prune | Remove all stopped containers. |
Volumes
For a list of all available docker volume commands, run:
$ docker volume --help
| Command | Description |
|---|---|
docker volume | Manage volumes. |
docker volume create | Create a volume. |
docker volume inspect | Display detailed information on one or more volumes. |
docker volume ls | List volumes. |
docker volume prune | Remove unused volumes. |
docker volume rm | Remove one or more volumes. |
Markdown
Basic Syntax
| Element | Markdown Syntax |
|---|---|
| Heading | # H1 |
## H2 | |
### H3 | |
| Bold | **bold** |
| Italic | *italic* |
| Blockquote | > Blockquote |
| Ordered List | 1. First item |
2. Second item | |
3. Third item | |
| Unordered List | - First item |
- Second item | |
- Third item | |
| Code | `code` |
| Horizontal Rule | --- |
| Link | [title](https://www.example.com) |
| Image |  |
Extended Syntax
| Element | Markdown Syntax |
|---|---|
| Table | | Syntax | Description | |
| | ----------- | ----------- | | |
| | Header | Title | | |
| | Paragraph | Text | | |
| Fenced Code Block | ``` |
| { | |
| "firstName": "John", | |
| "lastName": "Smith", | |
| "age": 25 | |
| } | |
| ``` | |
| Footnote | Here's a sentence with a footnote. [^1] |
[^1]: This is the footnote. | |
| Heading ID | ### My Great Heading {#custom-id} |
| Definition List | term |
: definition | |
| Strikethrough | ~~Strikethrough.~~ |
| Task List | - [x] Task done |
- [ ] To do | |
- [ ] Another task to do | |
| Emoji | Happiness! :joy: |
| Highlight | Let's highlight these ==important words==. |
| Subscript | H~2~O |
| Superscript | X^2^ |
| Underlined | <ins>Underlined</ins> |
Termux on Android
Termux is a Linux terminal emulator that runs on Android in a sort of chroot.
Installation and first steps
You can install it from the Play Store or the F-Droid app.
After doing that, I usually install some packages with the following command:
apt install termux-am vim
Then I give storage authorization by running:
termux-setup-storage
Installing Fedora on Termux
Termux is awesome, but it has more limitations than a whole GNU/Linux distribution running in proot.
Fedora is a stable and complete distribution, and you can install it above Termux by running the following command:
pkg install wget openssl-tool proot tar -y && hash -r && wget https://raw.githubusercontent.com/EXALAB/AnLinux-Resources/master/Scripts/Installer/Fedora/fedora.sh && bash fedora.sh
Then, run the following command:
echo "bash start-fedora.sh" >> ~/.bashrc
This way, every time you start Termux, a new session of Fedora will be started.
Setting up Fedora on Termux
Let's install some packages:
dnf -y install vim wget git rustc cargo python3 npm nodejs openssl curl fzf zoxide xsel
Now, I need to customize my Fedora by importing my configs from a dedicated repository.
Before doing that, I want to have access to my GitLab account from my Android device via the SSH server.
Let's create a new SSH key:
ssh-keygen && cat ~/.ssh/id_rsa.pub
Then, I need to add the public key to my GitLab account.
ssh-add ~/.ssh/id_ed25519.pub && cat ~/.ssh/id_ed25519.pub
Then, from my GitLab account's profile, I can add the SSH key to my account.
Now I can clone my dotfiles' repository via SSH method:
git clone git@gitlab.com:fatualux/dotfiles.git
And replace the default configs with my customized ones.
cp -r dotfiles/.* . && rm -rf dotfiles